A Easy Way to Tighten Single Handle Faucet
Whether your kitchen faucets and bathroom sink faucets are famous branded, they will eventually develop a problem following the long-term use, such as the shaky of the faucet, and the loose of the faucet handle. And how to fix them, when these problems happen? Luckily, this post would guide you on how to fix the loose of the faucet and faucet's handles.
What are Faucet Types
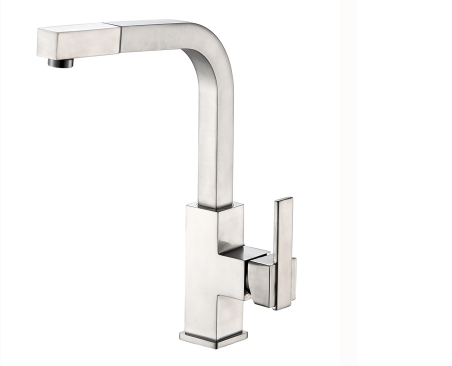
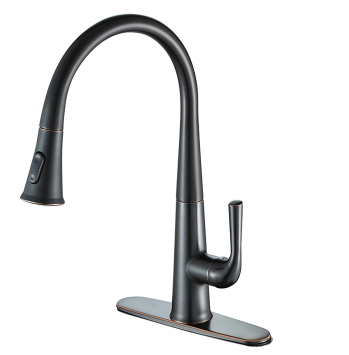
Generally speaking, each type of kitchen faucet hardware has different repair requirements, because of the different faucet structures. For example, a single-handle faucet has one handle for controlling both the water pressure and temperature. By contrast, the double-handle taps separately control hot and cold water.
What Causes a Loose Kitchen Faucet
When we are working in the kitchen with a wobbly kitchen faucet, we always get frustrated and annoyed with this. And, even manage to tighten the faucet, they still come loose again. "And, why does my kitchen faucet keep coming loose?" you may ask. The following reasons are common:
●Improper Installation: The improper installation is the first reason that causes the loose kitchen faucet. wrong-sized piping, screw, faucet, or other components will lead to a loose tap.
●Loose Screws: Generally speaking, the faucet pipes require multiple screws to fix to the sink's base. If these screws loose, your faucet will become shaky due to either vibration at the sink or faulty installation.
●Loose Faucet Base: The spigot’s handle usually is close to the center of the faucet’s base. With each use, the faucet base gradually get loose. And the loosing of the kitchen faucet base also affect the overall performance of the water kitchen faucet or causes the water leakages.
●Worn-out O-ring: In the typical design of the kitchen faucet, an O-ring is used for keeping the handle in position. After years of intensive use, the O-ring may slacken.
In summary, if you don’t ensure the reason why the faucet gets loose before performing repairs, the faucet is still shaky. On some extreme occasions, you may need to replace the entire kitchen sinks and faucets.

How to Fix A Single-Handle Kitchen Faucet Loose At Its Base
As I mentioned above, the right way to fix the kitchen faucet is its design and cause. If the whole faucet is shaky, it likely has loose nuts at the base. In this section, I outline the steps for fixing the faucet bases on the modern kitchen faucets.
Required Tools
To make a good job on the fixing kitchen faucets, you need to prepare the blow tools:
● Flashlight
● Hand gloves
● Adjustable wrench or Hex head wrench
● Basin wrench
● Mini knife
● Masking tape
● Teflon tape
● The right Allen wrench size (3/32 inch is ideal for most faucets)
● Flashlight
● Hand gloves
● Adjustable wrench or Hex head wrench
● Basin wrench
● Mini knife
● Masking tape
● Teflon tape
● The right Allen wrench size (3/32 inch is ideal for most faucets)
7 Steps to Fix the Kitchen Faucets
Step 1.You need to clear under the sink to ensure the maximum space to work
Step 2. Plug the sink drain to prevent nuts, screws, or other small components from falling in.
Step 3. Turn off the water valve from blowing the sink. If you can not find the switch under the sink, you can switch off the main water pipe.
Step 4. Open the faucet to confirm the water supply lines are off and release all the pressure from the water supply lines. It is the most important step that determines whether you could successfully do the job.
Step 5. Under the kitchen faucet, find the water supply line and remove them with the adjustable wrench. Tip: In order o prevent scraping your knuckles, remember to wear gloves to implement this step.
Step 6. Use a basin wrench to hold the nuts which connect the faucet with the base. Tighten the loose nuts to re-secure the faucet and eliminate shaking.
Step 7. At last, you re-open the supply valves to test the faucet, so as to verify the water is flowing without leaks.
How to Tighten A Loose Handle On A Single Faucet
When you find out just the handle and not the entire home kitchen faucets, you will need to prepare the same tools listed above. Here is the following process to fix your loose handle.
Step 1. As same as the above first step, you need to clear up the sink, plug the water drain and turn off the water supply valves.
Step 2. Check the type of the faucet’s handle. You need to identify whether the faucet is traditional or one with a big decorative head. Typically, the traditional one has a set screw at the top or under small colored or metal decorative caps.
Step 3. If the set screw is visible, you just need to hold the faucet in place and tighten the screw. If not, the set screw may be under the cap, and you could remove the cap with a flat head screwdriver or your small knife.
Step 4. If your home kitchen faucets have a decorative handle, you could remove the caps which usually locate the rubber cap at its top or sides to find the hidden set screw. Using a flathead screwdriver and pliers is okay. But, an Allen wrench is highly recommended.
Step 5. You have to slide the wrench into the hole until you find the set screw. In this step, it is difficult to work, because the screw is out of your eyes.
Step 6. Once you feel the Allen wrench engages with the screw, just tighten it by twisting in a clockwise direction. Once you feel resistance, stop tightening. If the screw is tightened too much, the faucet handle may become challenging to operate.
Step 7. At last, you also need to turn on the water valve to check whether it has water leakage and if the faucet is properly functioning.
Conclusion
All in all, the most money-saving method to fix the shaky single-handle faucet on your own. Remember that fixing your faucet will depend on the fixture’s design. To prevent some accidents happen, you have to stick with our above-listed steps to fix the kitchen faucets within minutes.


